
Glasses Glare Before and After
Three common lens problems: a ring light blown out across both lenses, sunlight from a window, and a heavy reflection that hides the eyes. Drag each slider. The frames stay; the lenses clear.
Ring-light glare
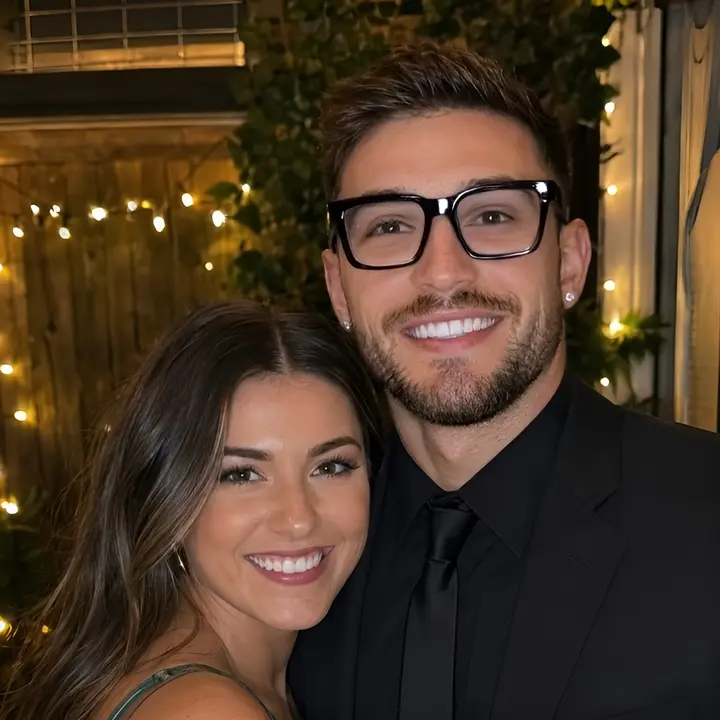
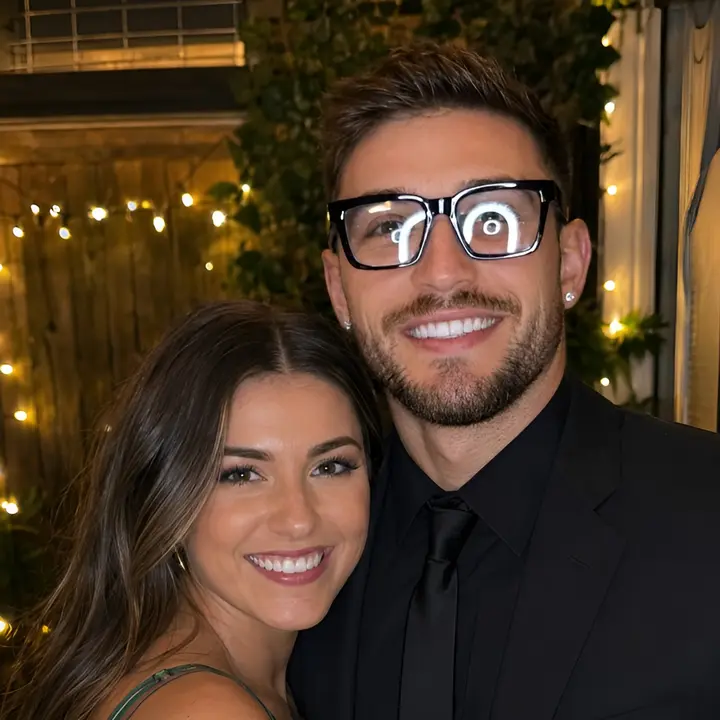
Drag to compare
These pairs show ring-light glare, window sunlight, and a heavy reflection. Use them as a reference, then upload your own portrait and run the same kind of cleanup on this page.
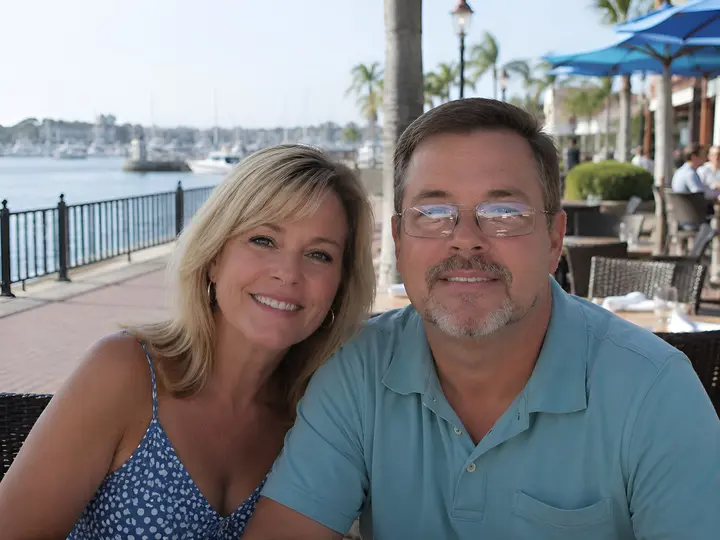
Remove glareSunlight on the lenses


Heavy reflection

What this glasses glare remover does
Flash, ring lights, and windows bounce off eyeglass lenses and hide the eyes. This page clears that glare and keeps the glasses on, so you do not have to reshoot a portrait that was otherwise fine.
A white disc from a ring light, a window reflected in both lenses, or a bright streak across one eye is enough to ruin a headshot, a school photo, or a wedding portrait. Cropping does not help, and taking the glasses off in an editor changes the person's face. The job is narrower: reconstruct what is behind the glare and leave the frames, pose, and background alone.
The editor sits on this URL. Upload a JPG, PNG, or WebP up to 20 MB, run it, and drag the slider before you download. Most portraits finish in about 15–40 seconds. Sign-in is required, and each run costs 6 credits, shown on the button.
The examples above cover the three glare types people actually upload. Ring-light glare is a hard white oval. Sunlight is a directional streak from a window. Heavy reflection covers most of both lenses. Results are strongest when the frames and some of the eyes are still visible. A completely blown-out ring light can still shift the eyes or the skin around them.
Why clear lens glare instead of removing the glasses
Keep the frames and the identity
The glasses are part of how the person looks. This pass targets the lenses, not the frames, hair, clothing, or background.
Built for the glare you actually get
Ring lights, on-camera flash, and windows are the usual sources. The before-and-after cases on this page match those three situations.
Compare before you keep the file
The slider is on the result, not a separate gallery. Check the eyes, the frame edges, and the skin before you download.
Browser only, no desktop app
JPG, PNG, and WebP up to 20 MB. Credit cost is visible before you generate. New accounts can try it with signup credits.
How to remove glare from glasses
Three steps on this page: upload a portrait, run the glare pass, then compare and download.
Upload the portrait
Drop a photo on the uploader or click one of the sample portraits. The sample set covers ring light, sunlight, and a heavy reflection.
Remove the lens glare
Sign in and click Remove glare. The job uses 6 credits. Stay on this page while it runs, usually 15–40 seconds.
Compare and download
Drag the slider across the eyes and the frames. If the result looks right, download the PNG. If the glare was total, try a less blown-out original.
What you get on this page
Lenses, not the whole face
The instruction is to clear glare and reflections on the lenses and leave frames, identity, pose, lighting, and background in place.
Eyes reconstructed behind the glare
When some of the iris is still visible, the pass fills the blown-out area instead of leaving a white disc on the lens.
Before and after on the result
After processing, the same slider used in the examples above compares your original with the cleaned portrait.
Sample portraits you can run
The three case photos sit under the uploader. Click one to load it, then run it yourself instead of only looking at the gallery.
JPG, PNG, and WebP
Up to 20 MB. No plugin and no desktop install. Phone browsers can upload from the camera roll.
6 credits, shown first
The button shows the cost before you generate. Signup credits cover a first try. Paid packs are on the pricing page.
When glasses glare removal helps
Portraits where the shot is good and only the lenses are ruined
Ring-light and studio headshots
A circular catchlight that covers the whole lens hides the eyes in creator photos, LinkedIn crops, and product-demo stills. Clearing the disc keeps the studio look.
Window sunlight
Side light from a window paints a bright streak across one or both lenses. The face is already lit well; only the glass needs a fix.
Wedding, school, and event photos
You cannot reshoot a ceremony or a class photo. A glare pass saves the frame when the glasses and the expression were otherwise right.
ID, passport, and badge photos
Flash on a plain background often blooms on the lenses. Specs that require glasses to stay on still need the eyes visible.
Tips for a cleaner result
Use the largest original you still have. A screenshot of a screenshot has already crushed the eyes. JPG, PNG, or WebP from the camera or the original export is the right input.
This works best when the frames are sharp and some of each eye is still visible around the glare. A ring light that is a solid white oval can still change iris shape or smooth the skin. If that happens, try a slightly different crop or a less exposed file rather than running the same image again.
Check the slider at the frame edges, the catchlights you want to keep, and the skin next to the lenses. Download when those hold. If you still need sharper skin or a lighting change, continue in photo retoucher, skin enhancer, or relight instead of asking this tool to restyle the portrait.
What people use it for
“Every ring-light headshot had two white coins on the lenses. I stopped reshooting just to move the light six inches.”
Lauren Kim
Portrait photographer

“School photos always catch the gym windows. Clearing the lenses kept the glasses and the kid's face the same.”
Marcus Hale
School photographer

Related tools after the lenses are clear
Glare removal is one pass. These stay on Pixwit if the portrait still needs retouching, sharper detail, a broader edit, or new light.
- Photo Retoucher
Clean skin, stray hairs, and small distractions after the lenses are already clear.
- Skin Enhancer
A separate skin pass when the portrait is soft, without asking glare removal to smooth the whole face.
- AI Photo Enhancer
Add sharpness and detail if the file is still soft after the glare is gone.
Background reading: Specular reflection (Wikipedia)
Glasses glare questions
Does this remove the glasses?
- No. It clears glare and reflections on the lenses and leaves the frames in place. Taking the glasses off is a different edit and changes how the person looks.
What kinds of glare does it handle?
- Ring-light discs, window sunlight, on-camera flash, and heavier reflections that cover most of the lens. The three sliders on this page are those cases.
What photos work best?
- Portraits where the frames are sharp and some of the eyes are still visible. A completely white lens gives the model less to reconstruct, and the eyes can shift.
How do I remove glare from glasses in a photo?
- Upload a JPG, PNG, or WebP, sign in, and click Remove glare. Compare with the slider and download the PNG. Most jobs finish in 15–40 seconds.
How much does it cost?
- 6 credits per photo. The cost is on the button before you run it. New accounts get signup credits.
Can I try it without my own photo?
- Yes. Click a sample under the uploader — ring light, sunlight, or heavy reflection — then run it the same way as your own file.
Will it change the face, background, or crop?
- The pass is written to keep identity, pose, clothing, lighting, background, and crop, and to avoid recoloring anything outside the lenses. Heavy glare can still nudge nearby skin. Use the slider to check.
What file types and sizes work?
- JPG, PNG, and WebP up to 20 MB. The download is a PNG.
What happens to uploaded photos?
- They are used to generate the result and are not published as a public gallery.
Remove the glare from your photo
Upload a portrait, compare the lenses before and after, and download. The glasses stay on.
Remove glare